Girls and fashion is inseparable. And fashion and makeup have blood ties. Now a days, no girl considers herself beautiful without putting at least an eyeliner on her face. Eyeliner makes the eyes look bigger, beautiful and more attractive. Eyes are already a very beautiful feature of the face and putting on the eyeliner enhances them more. I don’t think there exists a girl who haven’t at least put on an eyeliner for any occasion even if she is running out of time. Winged eyeliner is one of the most famous eyeliner styles. There are many eyeliner tutorials available on the internet for perfectly putting on this liner. Specially those girls who have small eyes love to put on this eyeliner. It looks good on everyone. There are many choices from which we can select which eyeliner should be used for this purpose. Now a days, gel eyeliner is quite famous for putting eyeliners. Pencil eyeliner is also used by many girls. Liquid eyeliner is also widely used for this purpose.
Winged eyeliner has long been used for creating a glamourous look. It is usually created by putting on plain eyeliner and adding an extra flick at the outer corner of the eyelid. If we watch some old movie, we can notice the actresses with beautiful, big winged eyes. Usually an angled brush is used for this eyeliner. Following is the step by step tutorial of putting on a perfect and sleek winged eyeliner.
Winged Eyeliner Tutorial Step By Step
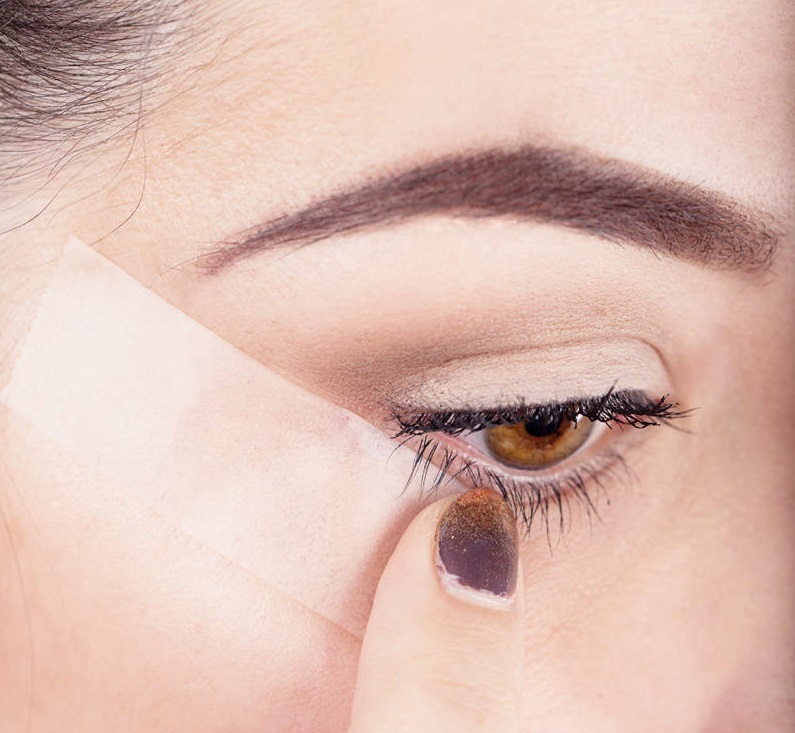
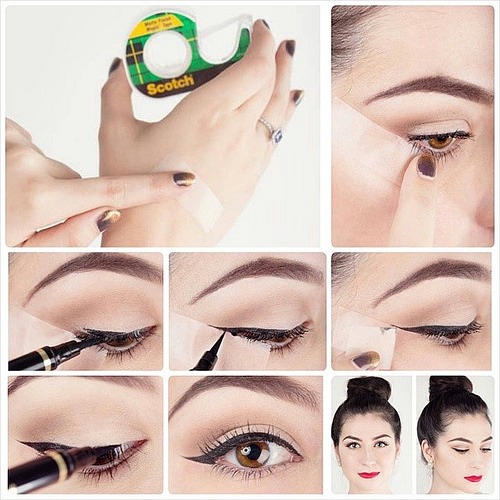
Place Scotch Tape
For those girls who are not confident enough of the steadiness of their hands, I suggest placing a small piece of Scotch tape along the lower eyelid towards the end of eyebrow.
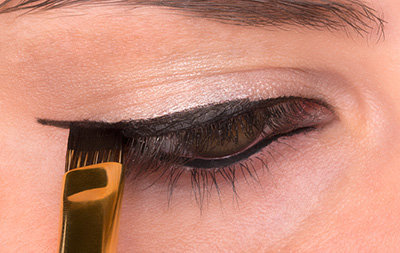
Put Base Eyeliner
First, dip the brush in the eyeliner and put it on gently on the upper eyelid lash line. Take the brush towards outer corner of the eyelid. Make sure that you are creating an angled line for a perfect look.
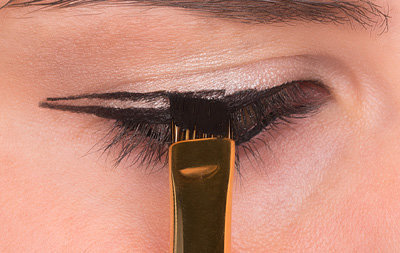
Create Wing Outline
Next step consists of creating an outline for the wing. Create a thin line just beside the line you just put on using light strokes from the outer corner of the bottom eyelid. The thin line should be angled according to the flick you want to give to your eyeliner. The outer corners of both lines should be joined.
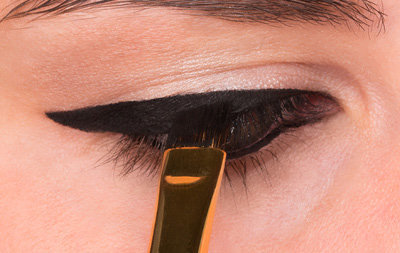
Fill The Space
Extend the liner towards the inner corner. Carefully put the liner along the lash line. You don’t want to make the liner thick here because it will totally ruin the look. Try to create a thin to thick eyeliner towards the outer corner. Fill the gap between both lines.
Finish The Look
Create the eyeliner on the other eye by using the above steps. Tada! you have created the best looking eyeliner 😉
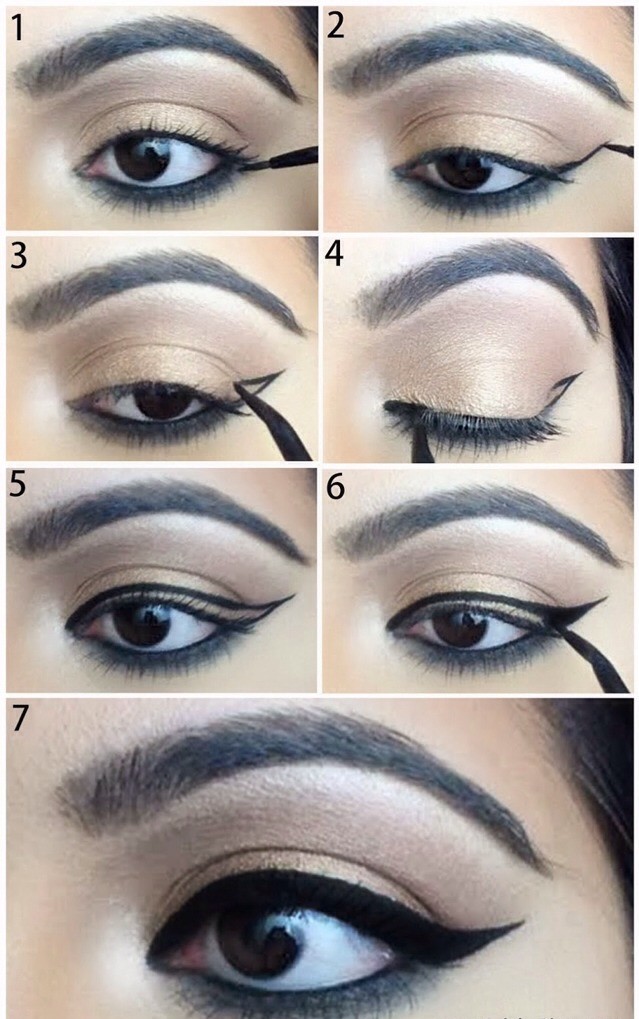
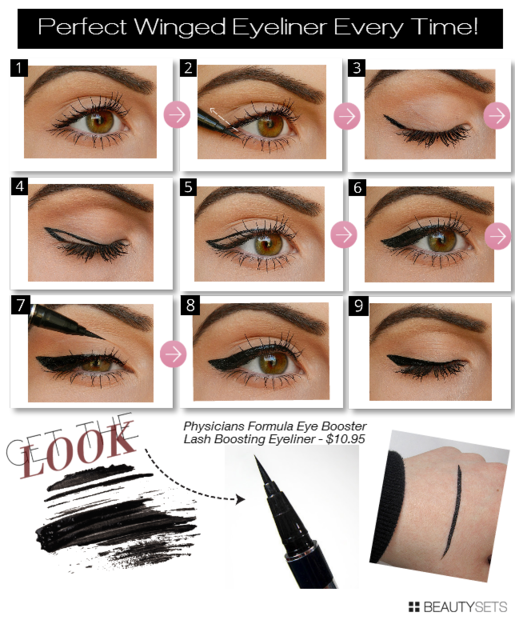
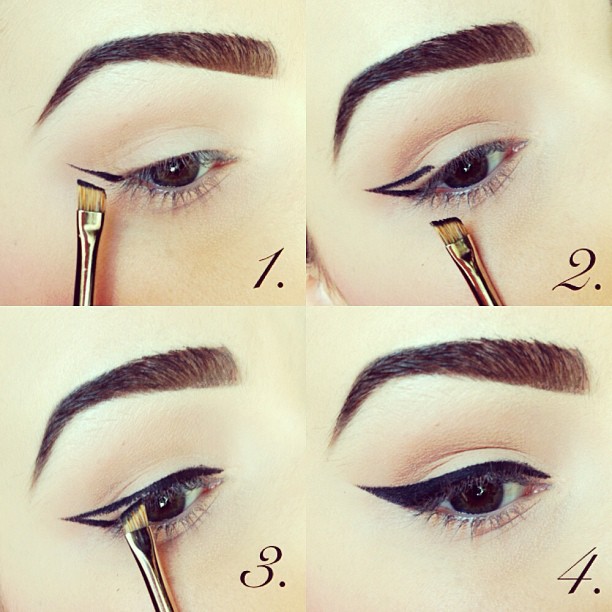
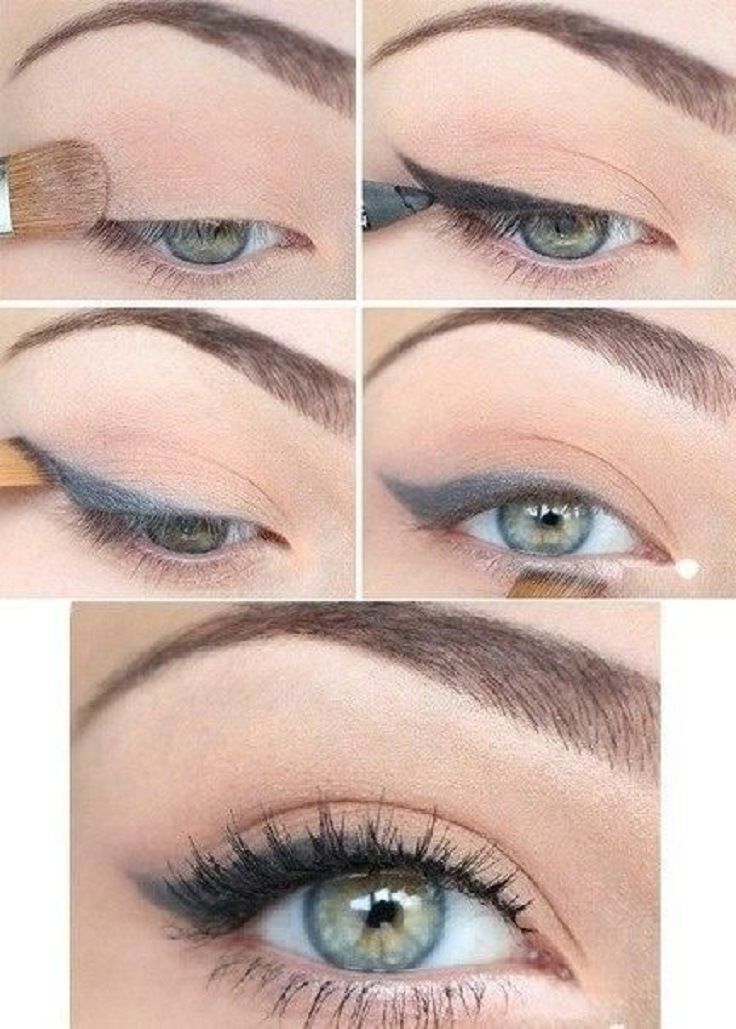
Hope you liked the tutorial. Following are some more winged eyeliner tutorial step by step. These pictures depict the steps necessary to create a perfect eyeliner.
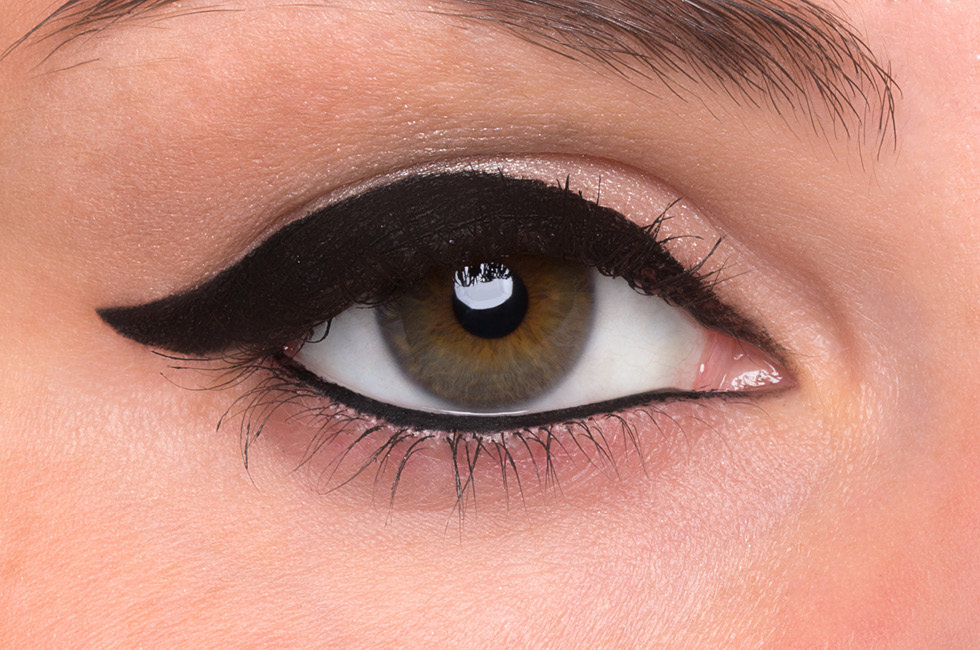
Perfect Winged Eyeliner
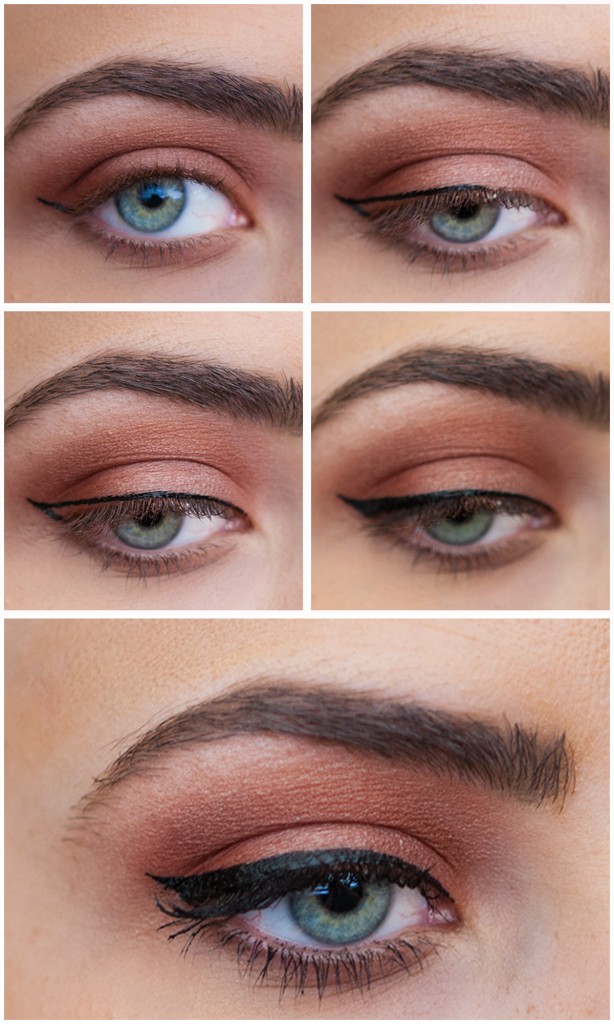
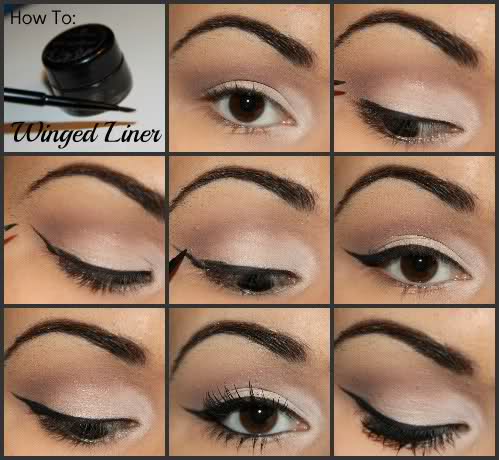
Eyeliner Steps
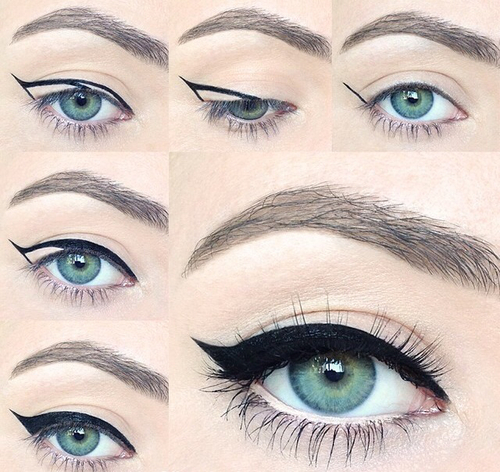
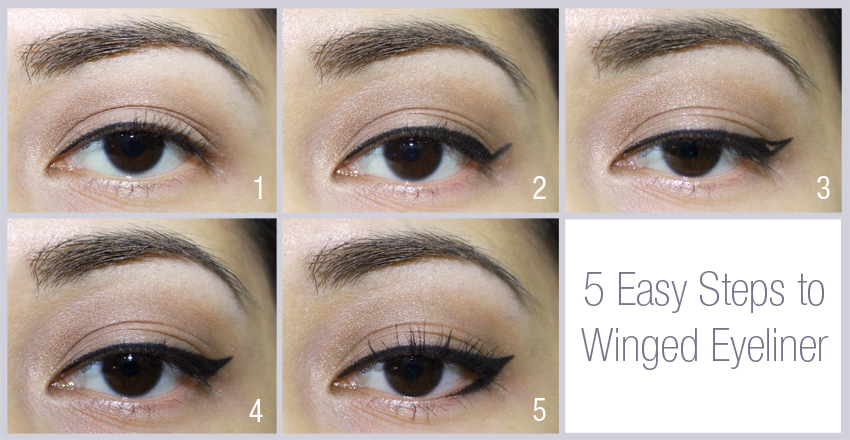
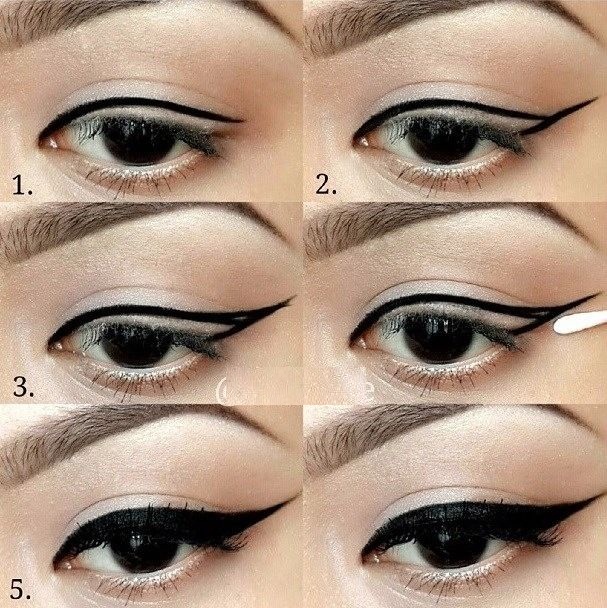
Easy Steps to Winged Eyeliner
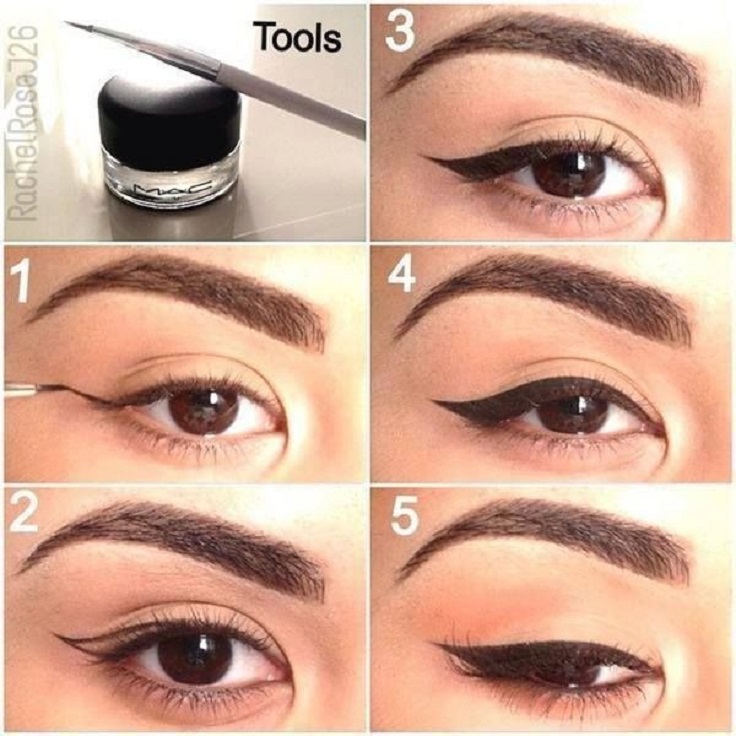
Eyeliner Tools and Steps
Beautiful Eyeliner
Eyeliner Tutorial
Simple Eyeliner Tutorial
Beautiful Eyeliner Tutorial
Perfect Eyeliner
Nice and Easy Eyeliner
Beautiful Blue Eyeliner
3 comments
wooowww every single posts are fabulous: )
Thank you so much 🙂
Keep following for more and also share with others 🙂
[…] image stylearena.net […]